
They talk about the Solution


 Try the Solution
  Uses Case
  Last Events
 Your Innovative Path
1
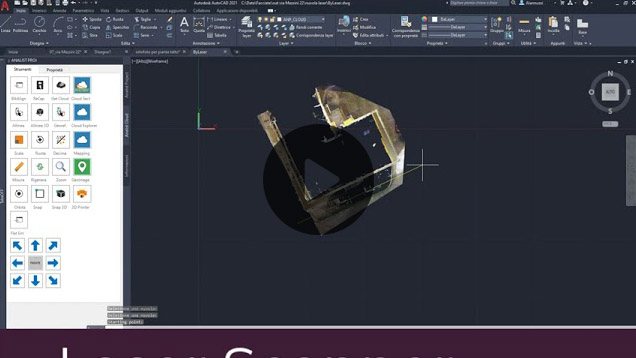
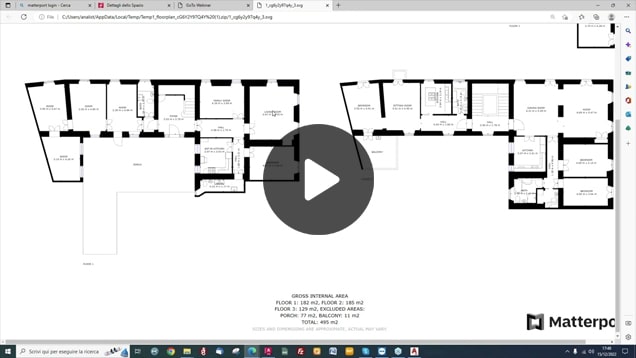
Get the floor plan in DWG
Matterport offers a floor plan production service that Analist 2024 automatically converts the DWG. The service is available within the Spaces control panel and is cheap and effective. Read more…
2
Create Reports
La camera Matterport Pro3 consente di ottenere foto ad alta risoluzione con elevata apertura focale e prive di deformazione prospettica, ideali per essere processate con Analist 2024 e ottenere prospetti veloci ed accurati. Read more…
3
Acquire Point Clouds
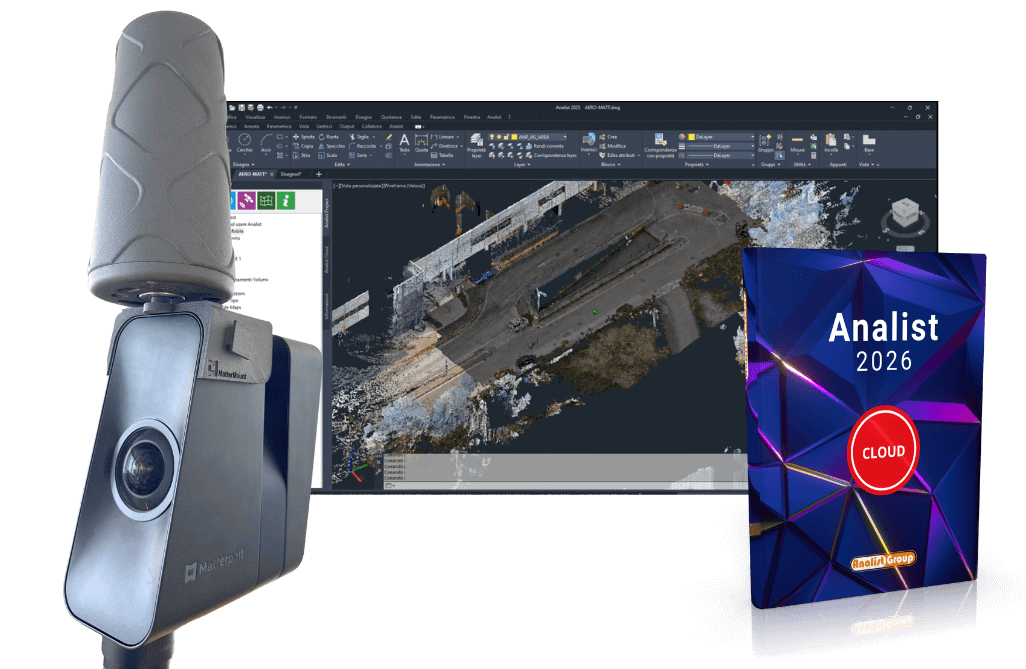
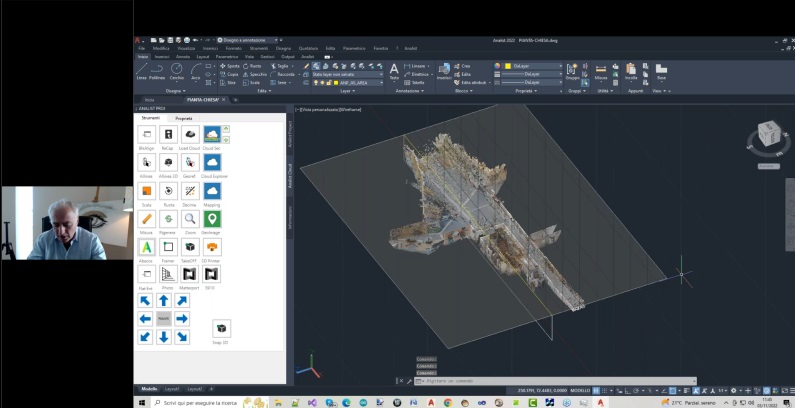
Matterport offers two cloud processing services. The first returns a cloud in XYZ format, the second in e57. The Pro3 is; It is also an amazing scanner capable of capturing point clouds with outstanding quality. color extremely high. Read more…
4
Create a terrain profile
The cloud developed by Matterport lends itself to the management of the topographic model of the land. Profiles, sections, volumes can be extrapolated as if from a survey carried out with conventional methods. Read more…
Your Innovative Solution
Fast, powerful, precise: it's the perfect choice. Pro3. Exceptional in every situation
The Laser Scanner captures up to 100 meters in just 20”. Ensures accuracy for large outdoor areas and complex properties. Extraordinary both in sunlight and in semi-dark conditions.
The Magic Word: Innovative Services
Matterport integrates innovative value-added services: the return of floor plans and point clouds is easy. the real competitive advantage for the Professional.
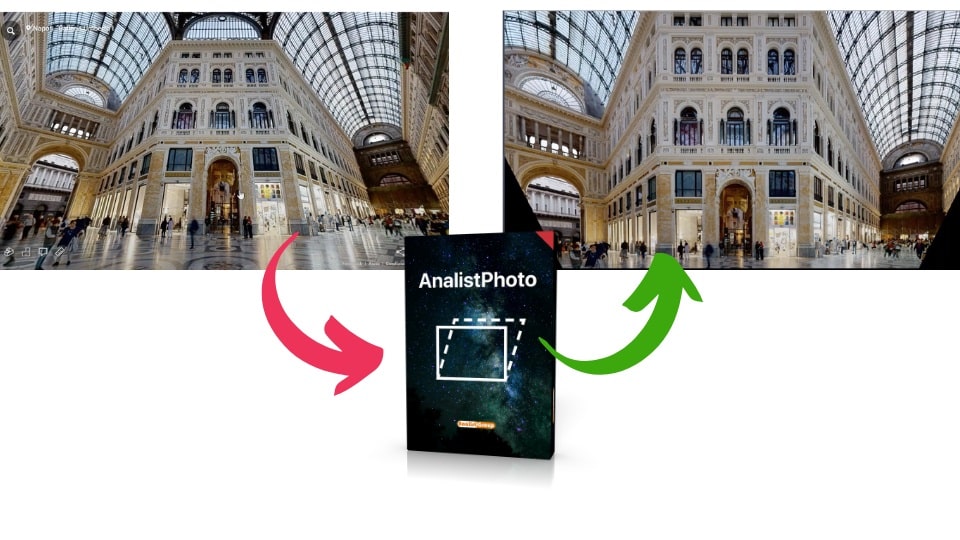
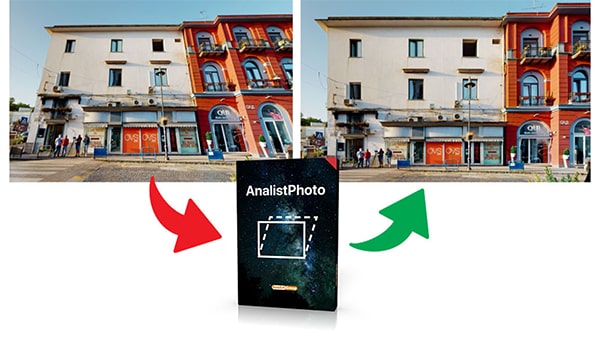
Just one click for perspective correction
With AnalistPhoto immediately correct the perspective of the images of facades acquired with Matterport to vectorize the elevations
The best solution chosen by professionals
The advantage of using Pro3-Analist is that really incalculable. Save 85% of time and increase your competitiveness. More projects mean more; earnings.
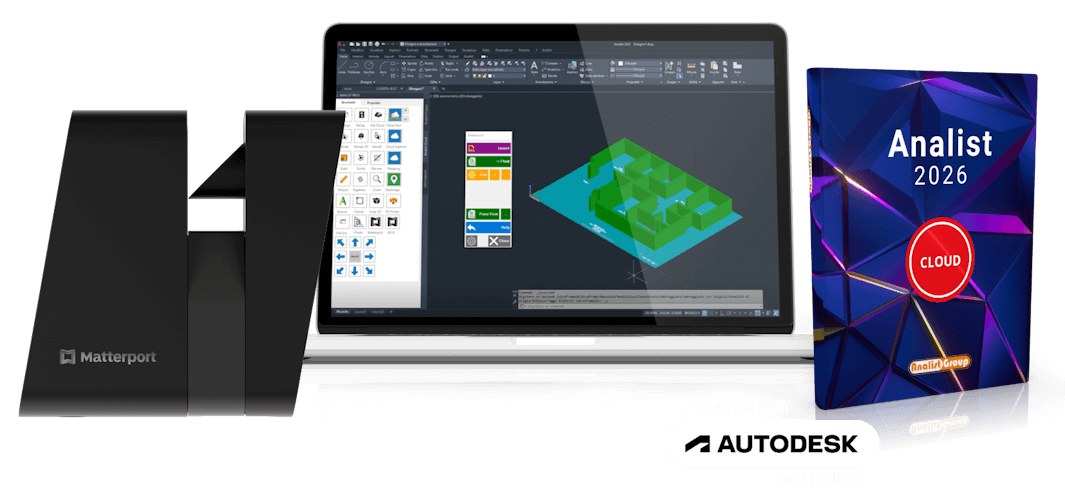
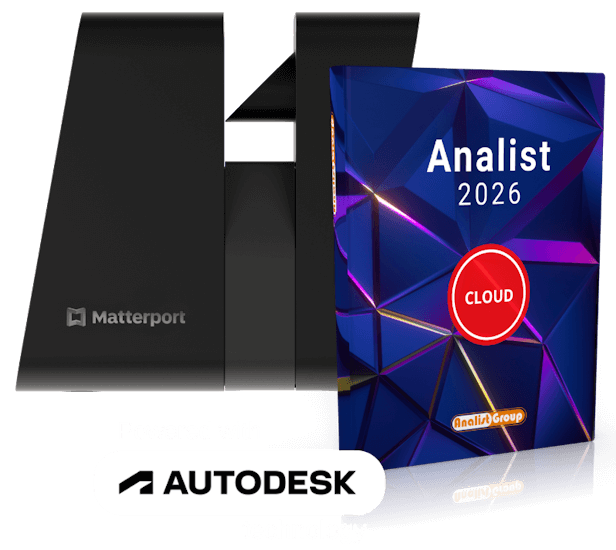
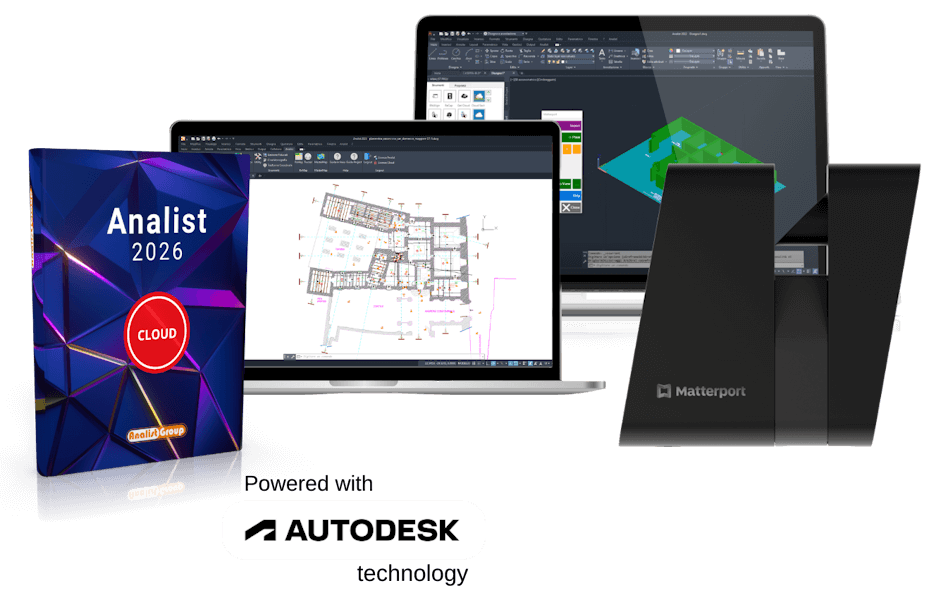
Experience the Power of Matterport Pro3-Analist
Download the Demo of Analist CLOUD and the datasets produced by Matterport. Import them into Autodesk Technology-based Surveying software. It will be an amazing experience.


Insights
Matterport, Analist and banner-promo
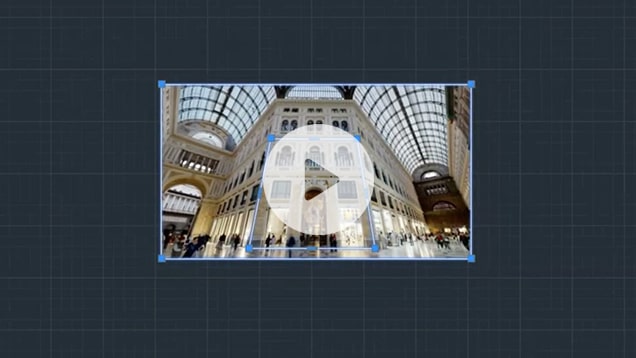
Discover the Power of the Matterport and Analist Solution with banner-promo in the Survey of Exteriors and in the Generation of Dimensional Plans
Matterport Pro3: the Unboxing
Discovering the Matterport Laser Scanner and the Pro3-Analist Solution. The ultimate in productivity for the relief of exteriors and interiors.
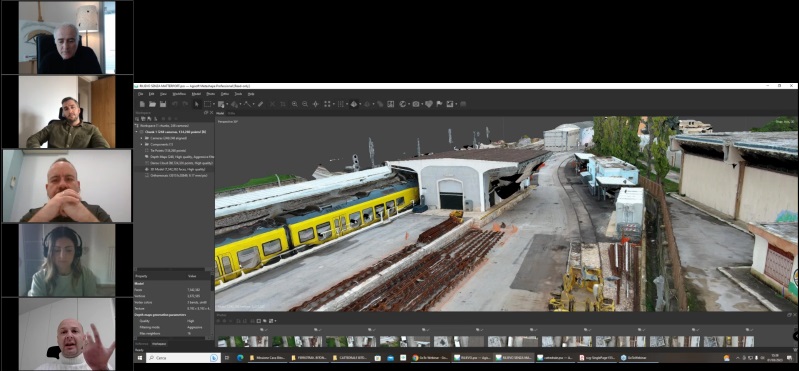
Matterport: Meet the Experts
From the hands-free voice of our Experts, all the advantages of using the Matterport-Analist Solution for the rapid, precise and productive survey of Interiors and Exteriors.
Get started now with Matterport Pro3
Using Matterport Pro3, the Laser Scanner for External and Internal Surveys, is easy to use. simple and does not require any preventive course. Find out how to use the latest technology; advanced in the capture of spaces in a highly productive way.
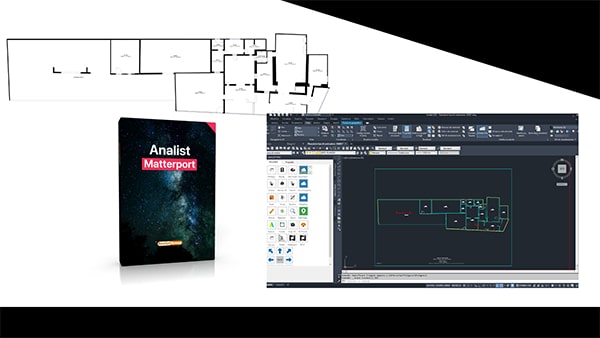
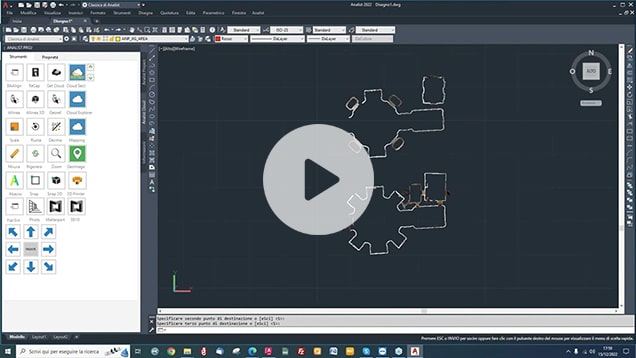
From SVG to DWG in one click
Analist CLOUD, based on Autodesk Technology, and its AnalistMatterport module allow you to import and convert the SVG file produced by Matterport into DWG and perform any type of operation on the planimetry. All in record time.
Immediate Perspective Correction
Analist Photo, module of Analist CLOUD, allows a fast and precise perspective correction of facades. The Solution allows you to make the most of the Matterport Pro3 aspherical trigger for extra-ordinary projects.
Complete management of the Point Cloud
Analist CLOUD allows you to import Point Clouds produced by Matterport and offers the User maximum usability in the analysis. to carry out any type of post-production operation. Sharing files with collaborators is not an option. never been so; easy.
FAQ: How can we help you?
To use the Camera and ensure its 360° rotation capability for capturing any type of space effectively, you need to have a Tripod that allows it to be at least 1.5 meters high.
First, place the Tripod stably on a surface or a platform. Then: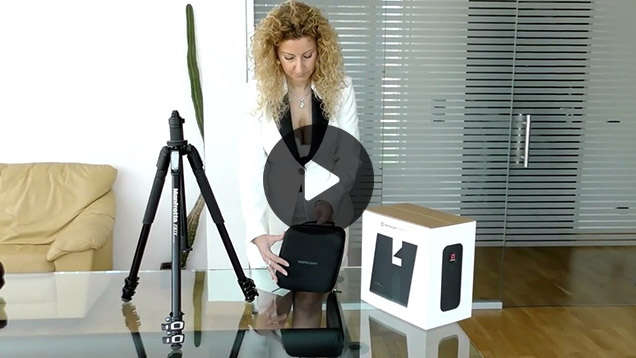
First, place the Tripod stably on a surface or a platform. Then:
- Attach the included clamp, which comes with the Matterport package, to the Tripod.
- Keep the clamp's safety lever open.
- Attach the Matterport Pro3 to the clamp and close the safety lever.
Matterport Pro3 should be placed on a tripod at a height of about 1.5 meters. To turn on the camera, press the dedicated button for approximately 3 seconds. Wait a moment for Matterport Pro3 to start. Afterwards, the Wi-Fi LED will start flashing: you will need to enable the Wi-Fi on your device (smartphone or tablet) that you will use to manage the camera and connect it to the Matterport network.
No, you don't need a data connection. The camera and the phone connect without an internet signal. Scanning can be done even without a network.
The minimum requirements are as follows:
- Android: version 8
- iOS: version 11
To control Matterport Pro3 during scanning, you must download the Matterport Capture app. The app:
- is free;
- is available on the Apple Store and Google Play;
- is compatible with iOS and Android devices.
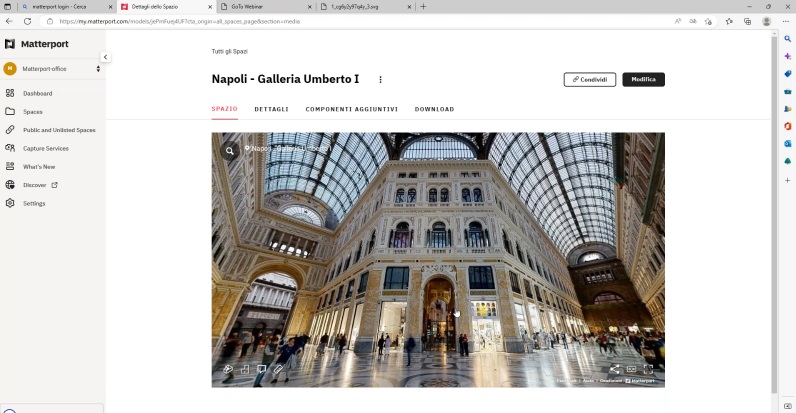
If you have purchased a Matterport device, then you need a Matterport Plan. What is it? It is the destination point for all your captures: through the Matterport Capture app, you send the acquired spaces here to allow Matterport Technology to process them and provide you with Digital Twins, Floorplans, and Point Clouds. Each Matterport Plan has a number of active spaces based on its type and price. Inside your Matterport Space, you can store and manage your projects, collaborate with your team members, and have access to all the datasets processed and provided by Matterport Technology. To receive the technical files resulting from your Matterport capture, a subscription to the Matterport Cloud is required. There are different plans available, and we recommend either the Professional Plan or the Business Plan.
It's very simple. You can do it quickly online. Click here to choose the Matterport Plan that suits you.
Each Space corresponds to a project and can contain up to 200 scans. Each Matterport Plan has a number of active spaces based on its range: if you fill up all the available spaces, you can archive "closed" projects and free up space for new projects. Matterport Spaces are not cumulative.
The Professional Plan allows the use of 25 Spaces and provides access for 5 users. The Business Plan, on the other hand, allows the use of 125 Spaces and provides access for 25 users. Both the Professional Plan and the Business Plan can be subscribed on a monthly or annual basis.
Access your account and choose the "Settings" option in the top right corner. A page will open where you can select the language. Check "Italian" to set your account to Italian language.
Matterport Plans are available in two versions: monthly and annual. At the end of the respective 30 days or 12 months, the Matterport Plan renews automatically.
To get information about your Matterport subscription plan, you need to access your account and go to the "Settings" section, then "Billing." Here, you will find all the details regarding your subscription and billing. Here's what you need to do:
- Access your Matterport account;
- Select the "Settings" option from the left menu;
- Within "Settings," choose "Billing";
- In "Billing," you will find information about your invoices and payments. From here, you can also check the number of occupied spaces and the users with access to your Plan;
- The renewal date of your Matterport Processing Plan is indicated under the "Next Invoice" section.
You can choose to suspend your subscription whenever you want, and you can reactivate it at any time. All the uploaded projects remain available to you.
The project remains available as long as the subscription is active. If the subscription is interrupted and later restored, the projects will also become accessible again.
Certainly. You simply need to enter the menu of your space and select the sharing option. In a few seconds, your collaborator or client will receive everything via email. This article might be helpful.
The Camera is capable of capturing 3D data up to 100 meters away in less than 20 seconds. It's important, during its use, to position the stations within a radius of about 7 meters from each other. This allows for an exceptionally realistic representation of the project and high measurement quality.
The WiFi connection has a range of approximately 7.5 meters indoors and about 22.5 meters outdoors. The Pro3 camera uses Bluetooth to facilitate the connection between the device's WiFi and the Pro3 camera. However, Bluetooth does not need to be enabled to use Pro3.
Matterport Pro3 should be advanced, for each scanning station, by about 7 meters (up to a maximum of 10) from the starting one. For a better survey outcome and a more precise capture of every detail, it is advisable to move Matterport Pro3 following a triangular logic. In other words, "drawing" triangles within the space, either inside or outside, to be captured.
The Matterport Pro3 camera is essentially a Laser Scanner. It can be positioned at arbitrary heights for each capture, adapting to different survey situations.
Matterport Pro3 is extremely capable and accurate in both low-light and high-light areas. If the area is very dark, it's always possible to illuminate it and move the light source along with the camera each time.
The successive stations should always "see" the previous one. Optical continuity between one station and another is necessary, especially when transitioning between rooms.
No, the alignment of scans is done automatically within the Matterport Capture app.
The recommended maximum number of scans is 200. For larger projects, simply create multiple projects.
Here are the steps you need to follow:
1. In the Matterport Capture app, tap the "Mark features" icon at the bottom right.
2. Select the "Mirrors" icon.
3. In the preview box, select the edge of the mirror and drag it to the other end of the mirror. This article can be helpful to you.
1. In the Matterport Capture app, tap the "Mark features" icon at the bottom right.
2. Select the "Mirrors" icon.
3. In the preview box, select the edge of the mirror and drag it to the other end of the mirror. This article can be helpful to you.
In the case of a multi-story building, it is necessary to scan the staircases that connect one environment to another. To capture the staircases, before moving to the next floor, you need to:
- Scan at the base of the ramp.
- Scan the intermediate landing.
- Continue with scans until reaching the next floor.
It's very simple. Position the camera at the base of the stairs for an initial scan. Then, stabilize it on the steps by balancing its position and adjusting the Tripod levers to the slope. The Matterport Capture app will provide immediate feedback on the correct alignment of the survey stations.
Absolutely not. In this case, you just need to perform multiple scans from different angles and viewpoints. The Matterport technology will extract the necessary information to reconstruct the facade.
It's not possible to capture a 360-degree photo with Matterport Pro3 without creating a new project and performing at least one scan first. After following these steps in the app's "Settings," you'll need to choose the "360-degree Photo" option and proceed with positioning the camera and capturing the 360-degree shot.
Simply access your Matterport Cloud account and select the project in your spaces. Then, click on the "Edit" button at the top right. You can explore the space and, in the command bar on the right, choose 360 and select the area of interest. This video can be helpful to you: 
There are several factors that could reduce the range of connection during your work with Matterport Pro3. The most common ones are:
- Interference from other networks on the same wireless band;
- Obstruction from walls, depending on their thickness, or other obstacles.
To upload your scan and initiate its processing, you need to choose the "Upload" command located in the upper right corner of the Matterport Capture app (the app you used for your work). Once this step is completed, a white cloud with a check symbol inside will appear. This screen indicates that the project is being uploaded. If the upload is successful, a checkmark will appear as confirmation. Be careful: if the cloud is red/orange, there might be issues with the upload. In that case, check if your internet signal is sufficient and the connection is stable. Here you can find further information.
Yes, you can resume scanning using the Matterport Capture app. You'll need to return to the location and continue your work. Matterport Pro3 will connect to the nearest scanning station and automatically allow you to resume the scan. If you have already uploaded the previous work to the Cloud processing, you'll need to reload your project and occupy a new Matterport Space, generating a new Digital Twin. After completing this step, you can delete the previous project if desired. If the work hasn't been previously uploaded to the Cloud, you can proceed with the upload as usual.
Firstly, you need to be logged into the Cloud using your personal account. You can upload the space by clicking on the three dots menu or by choosing the "Upload" option within your project. Keep the app open and the device turned on. Once the upload is complete, you'll receive a confirmation email containing a link to access the model.
The processing time of the model depends on various factors:
- Upload speed: The time required to upload from your iPad to the cloud.
- Processing queue: At certain times of the day, more models are being uploaded than others.
- Model size: This is the most significant factor. Larger models require more processing time. A model with only 1 or 2 scans can be completed in 30 minutes, while a model with over 200 scans may take 24 to 48 hours.
They are a combination of LiDAR scanning and photographic data. Matterport Technology creates a simulation of an existing place by using a series of panoramic photographs with a visual coverage of 180° vertically and 360° horizontally, known as photospheres. The photospheres are connected to each other, forming a freely navigable path for users on both PCs and mobile devices such as smartphones and tablets.
The output formats include both photos and scans and are as follows:
- 2D Snapshots;
- 360-degree Photosphere equirectangular;
- MP4 or GIF;
- Schematic floor plans in .svg, .pdf, and image formats;
- .obj files;
- Point cloud in .xyz and E57 formats.
Access your Matterport account. Select the reference project and then click on the "Add-ons" option: inside, you will find the floor plan and all other technical datasets automatically produced by Matterport. To download the floor plan, choose the "Download Schematic Floor Plan" option. This article can be helpful.
After selecting the "Download Schematic Floor Plan" option, within "Add-ons", a menu will appear that shows options related to downloading the floor plan: inside this menu, you will need to select the "Metric System" option. This article can be helpful.
Before downloading the floor plan, you need to change the sharing settings of the space from "Private" to "Public" or "Unlisted". This article can be helpful.
To order a floor plan or a point cloud, you need to meet the following prerequisites:
- You must have enabled Schematic Floor Plans on your account;
- You must have a Matterport Professional or higher level plan;
- Your scan must have been captured with a Matterport supported camera.
The Automatic Return of Floor Plans service is available for spaces up to 2300m2. In the case of extensions exceeding the limit it is possible, however, to divide the area into smaller spaces and order a floor plan for each of these. The cost of the Floor Plan is set at €15.00. MatterPak, or the Point Cloud in .xyz format, costs €54.00. The E57 Point Cloud, which is very high density, costs €99.00.
MatterPak is a data package intended for architects, engineers, and construction professionals who want to import these resources into third-party 3D programs (such as Analyst CLOUD, banner-promo, etc.). It includes .obj and .xyz files.
- .obj file: It is an open format already adopted by many 3D graphics applications and for data exchange with other programs. It represents a complete 3D mesh.
- .xyz file: It is a colored point cloud.
Yes, the generation of the Point Cloud happens automatically by requesting either the MatterPak, which is the colored Point Cloud in .xyz format, or the E57.
Your kit will come with a card containing a QR Code and a Redemption Code. Simply scan the QR Code or visit this page and enter the Redemption Code to receive the free MatterPak and E57 files. This article might be helpful for you.
With Analist, based on Autodesk Technology, you can import datasets processed and returned by Matterport and generate floor plans, sections, and elevations.
Matterport will provide you with the floor plan in .svg format. In order to use and work on it in a design and drawing environment, you will need to convert it to .dwg. You can easily do this with AnalistMatterport, the module of Analist that allows immediate conversion of the floor plan. This video can be helpful:
Certainly. The AnalistMatterport module not only converts the .svg file to .dwg, but also allows you to quickly and efficiently check the measurements to certify the accuracy and reliability of the survey.
Matterport floor plans can be downloaded in .svg format in 2D view. To determine the elevations, you need to work on the Point Cloud of the survey by importing it into Analist CLOUD. Here, you can trace a cross-section at the desired elevation.
You can rectify the photo with AnalistPhoto. It is the module of Analist dedicated to the perspective correction of images and achieves its goal in just a few steps. This video can be helpful:
Certainly. With Analist CLOUD, based on Autodesk Technology, you can generate floor plans, sections, and elevations directly from the Point Cloud. This video can be helpful: